
Create Your Trimlink Account
This guide walks you through registering a new Trimlink account and configuring your first workspace. You can authenticate using a quick social login or a standard manual email registration.
1. Choose Your Sign-Up Method
Option A: Sign Up with a Social Account (Recommended)
Skip the manual forms and instantly create a free Trimlink account using an existing social profile. This secure method removes the need to memorize a new password.
Supported platforms include Google, Facebook, X (formerly Twitter), LinkedIn, and GitHub.
How to connect:
- Navigate to the Trimlink Registration page.
- Scroll to the "OR" section below the standard form.
- Click your preferred social platform and authorize Trimlink to access your basic profile.
- Your account is created instantly.
Note: When using a social account, no email verification is required, and you will be routed directly to the workspace setup.
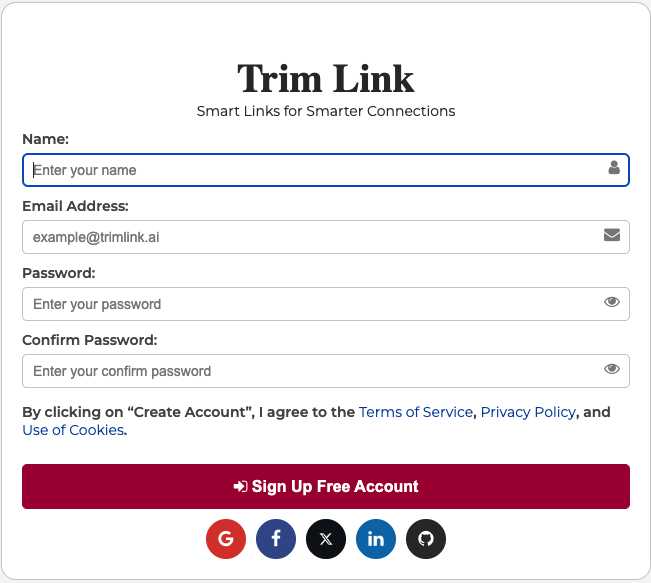
Option B: Sign Up Manually (Email & Password)
If you prefer to keep your social accounts separate, you can register using a standard email and password.
Provide the following details on the registration page:
- Full Name - Your display name on the platform.
- Email Address - Must be a valid email format and will be used for account access and communication. Special characters such as
+and-are not allowed. - Password - Must contain at least one uppercase letter, one lowercase letter, one number, and one special character.
- Confirm Password - Re-enter your password to confirm it.
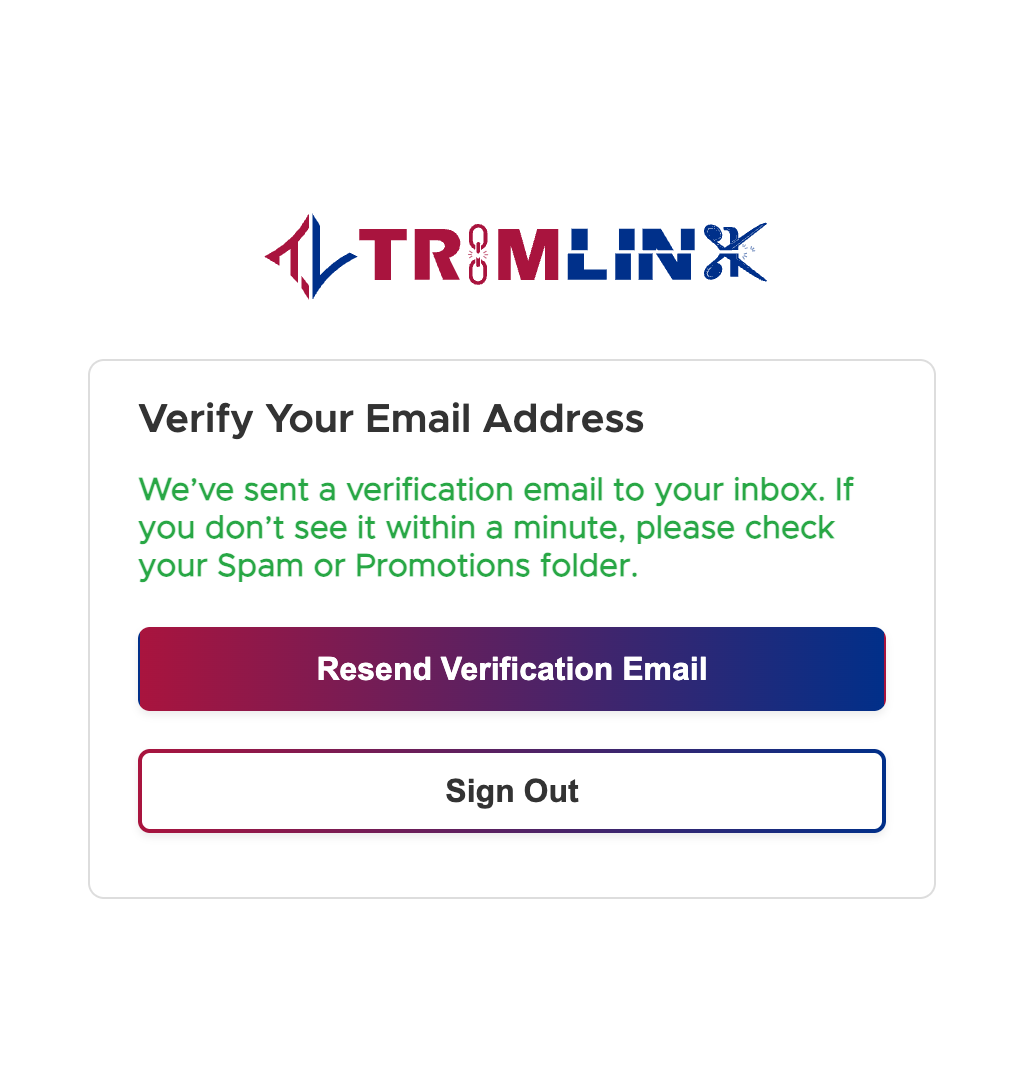
Important: After submitting the form, we will send a verification link to your registered email address. You must click the link in that email to verify your account before you can log in.
2. Complete Your Trimlink Workspace Setup
You're almost there—just one final step to create your Trimlink workspace. Verify your mobile number and share a few quick details to help us personalize your experience and keep your account secure.
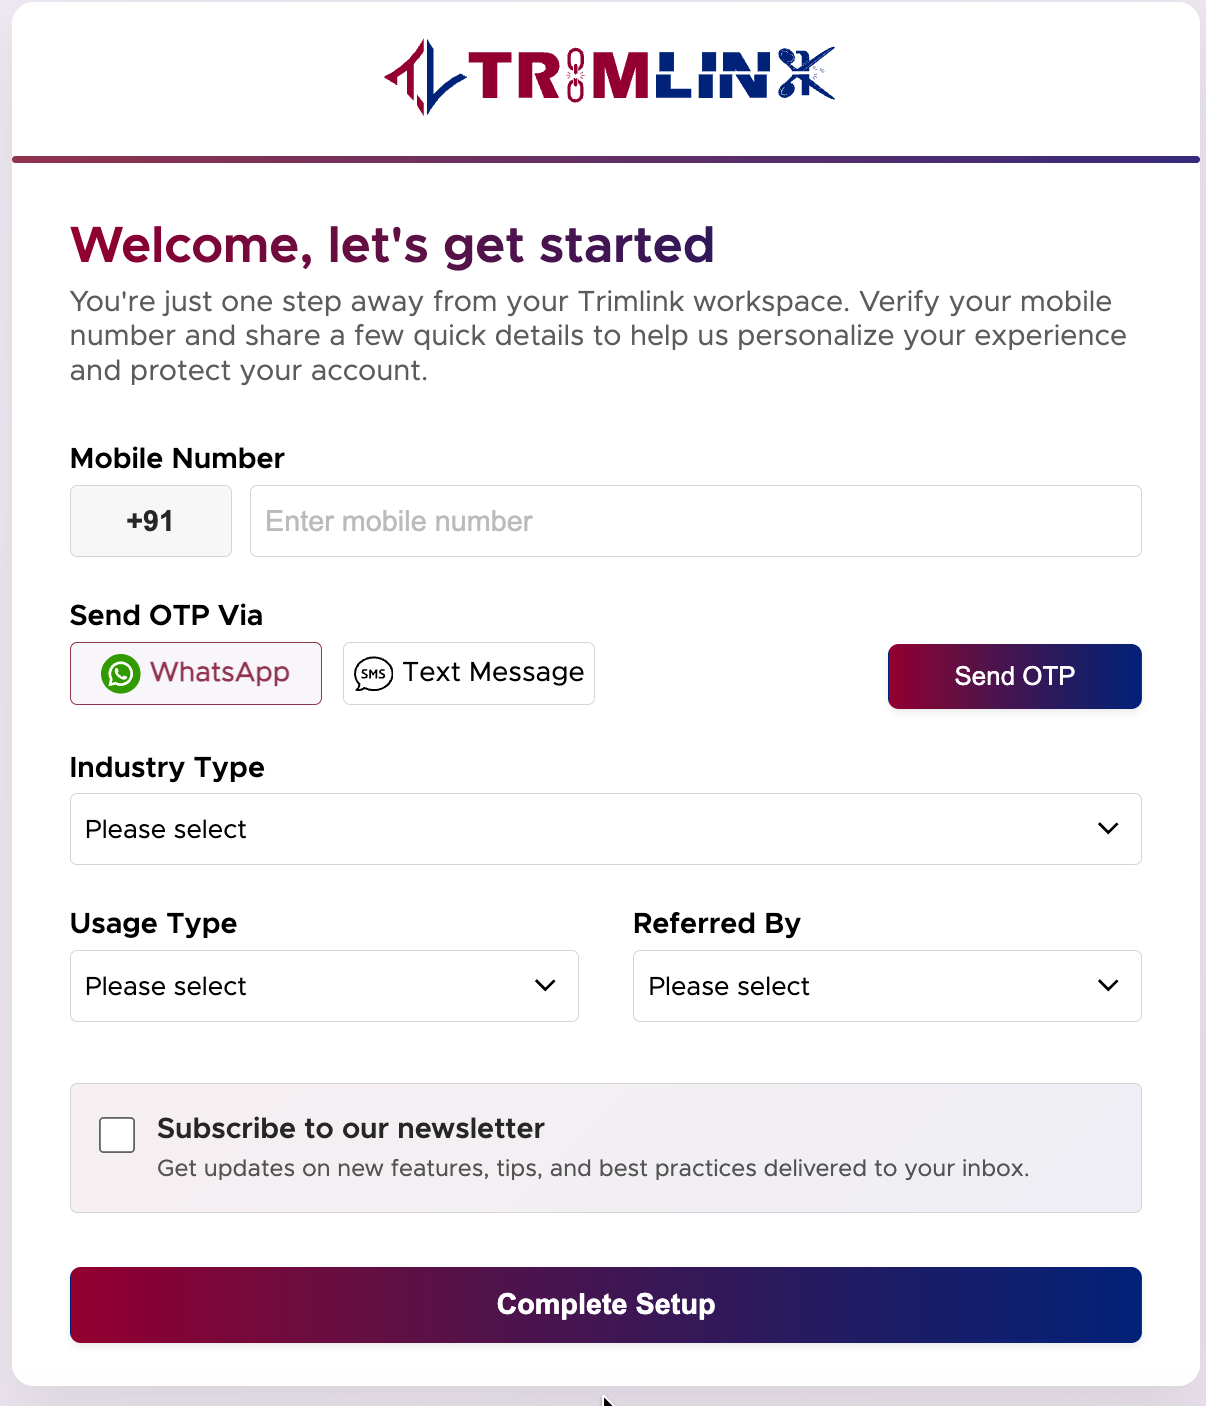
Mobile Number Verification
Enter your mobile number and choose how you would like to receive your 6-digit verification code: WhatsApp or Text (SMS).
- Enter your mobile number.
- Select WhatsApp or Text (SMS) as your preferred verification method.
- Click Send OTP.
- Enter the 6-digit OTP you receive.
- Click Verify OTP.
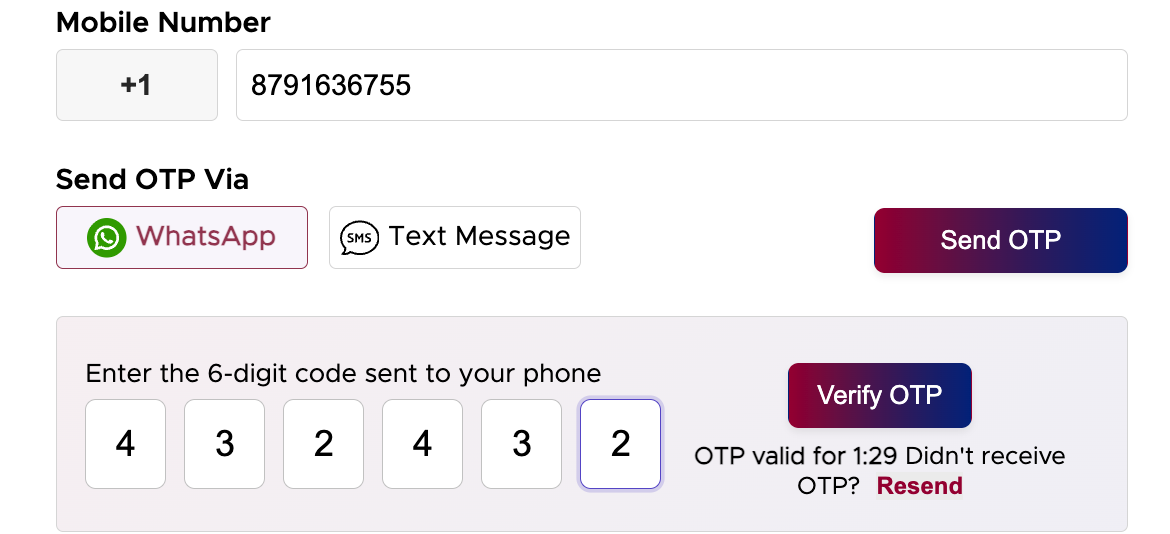
Note: If you do not receive the OTP immediately, wait for the countdown timer to expire and click Resend OTP. The OTP will be resent through your selected channel.
Country Code
Your country calling code is automatically detected based on your location. You can change the country code if required.
Tell Us About Your Trimlink Usage
Provide a few quick details to help us better understand how you plan to use Trimlink:
- Industry Type: Select the industry that best represents your business or professional activity.
- Usage Type: Select how you plan to use Trimlink, such as for personal, business, agency, or other professional purposes.
- Referred By: Let us know how you discovered Trimlink.
You may also choose whether to receive product updates, announcements, and optimization tips through our newsletter.
Complete Your Setup
After verifying your mobile number and providing the required details, click Complete Setup. You will be redirected to your new Trimlink workspace.
Your workspace is automatically configured with optimized default settings so you can start using Trimlink immediately. You can customize your workspace and account preferences at any time from Account Settings.
Frequently Asked Questions
- No. When you sign up using a social platform, that provider has already verified your identity. You bypass email verification and log in instantly.
- First, check your spam or junk folder. If you still don't see it after a few minutes, click 'Resend Email' on the verification page or contact our support team.
- Mobile verification adds an extra layer of security to your workspace. It prevents spam, deters fake accounts, and ensures a legitimate company profile is being created.
- Yes. When verifying your mobile number, you can choose your preferred OTP delivery method: WhatsApp or Text (SMS). Select your preferred option before clicking 'Send OTP'.
- Yes. The onboarding wizard simply gets your workspace up and running. You can update your company name, logo, phone number, and preferences anytime from your Account Settings dashboard.