OAuth Application Workflow and API Keys
Our API allows you to programmatically interact with services using secure access tokens or registered OAuth applications. This enables you to seamlessly integrate link management, analytics, and routing functionalities into your own software environment.
Critical Note on Workspace Scope and Data Access: The access level of your API Token or OAuth Application is strictly tied to your active Workspace at the moment of creation.
- If your active workspace is your default main workspace, your API credentials will only be able to retrieve and modify data within that specific workspace.
- If you require API access to manage data across all of your workspaces, you must switch your dashboard view to All Workspaces before generating your token or registering your application.
Phase 1: Generate an API Access Token
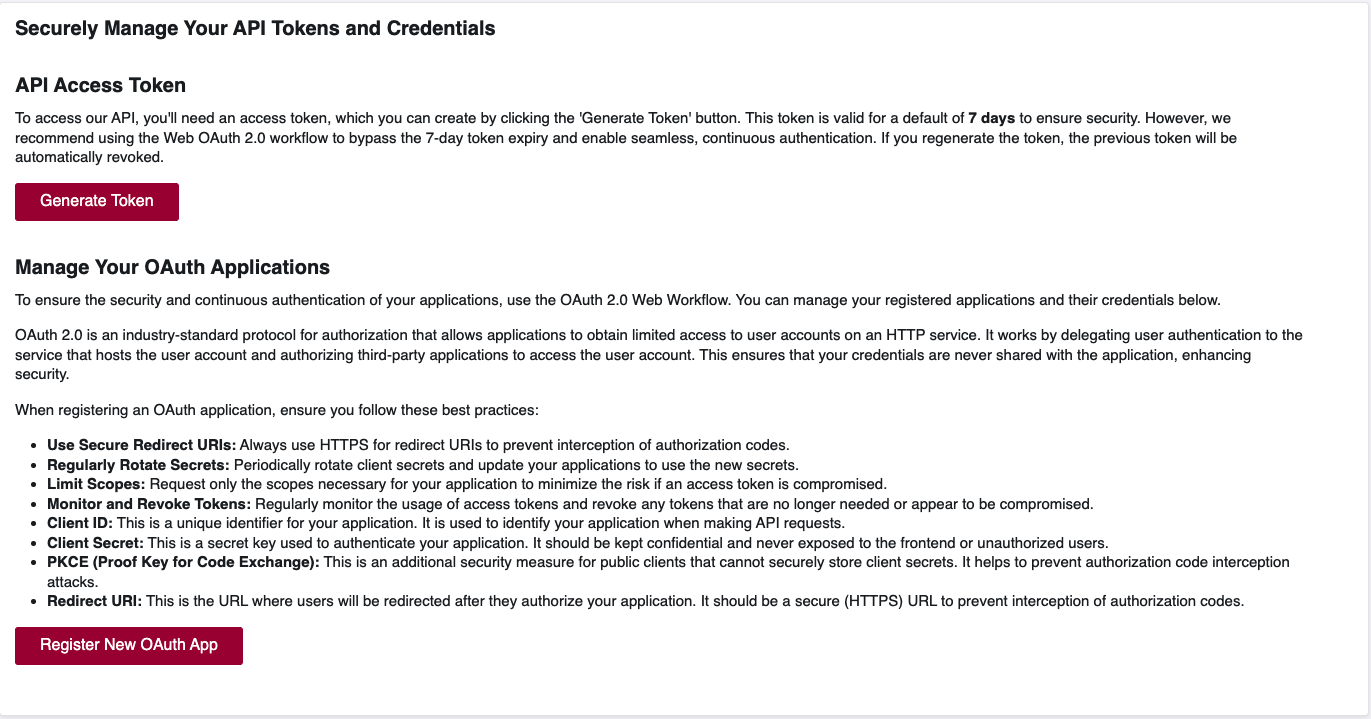
To begin using the API for your own internal automation, you will need an access token.
How to Generate a Token
- Navigate to API Integration on the left sidebar menu.
- Select API Keys.
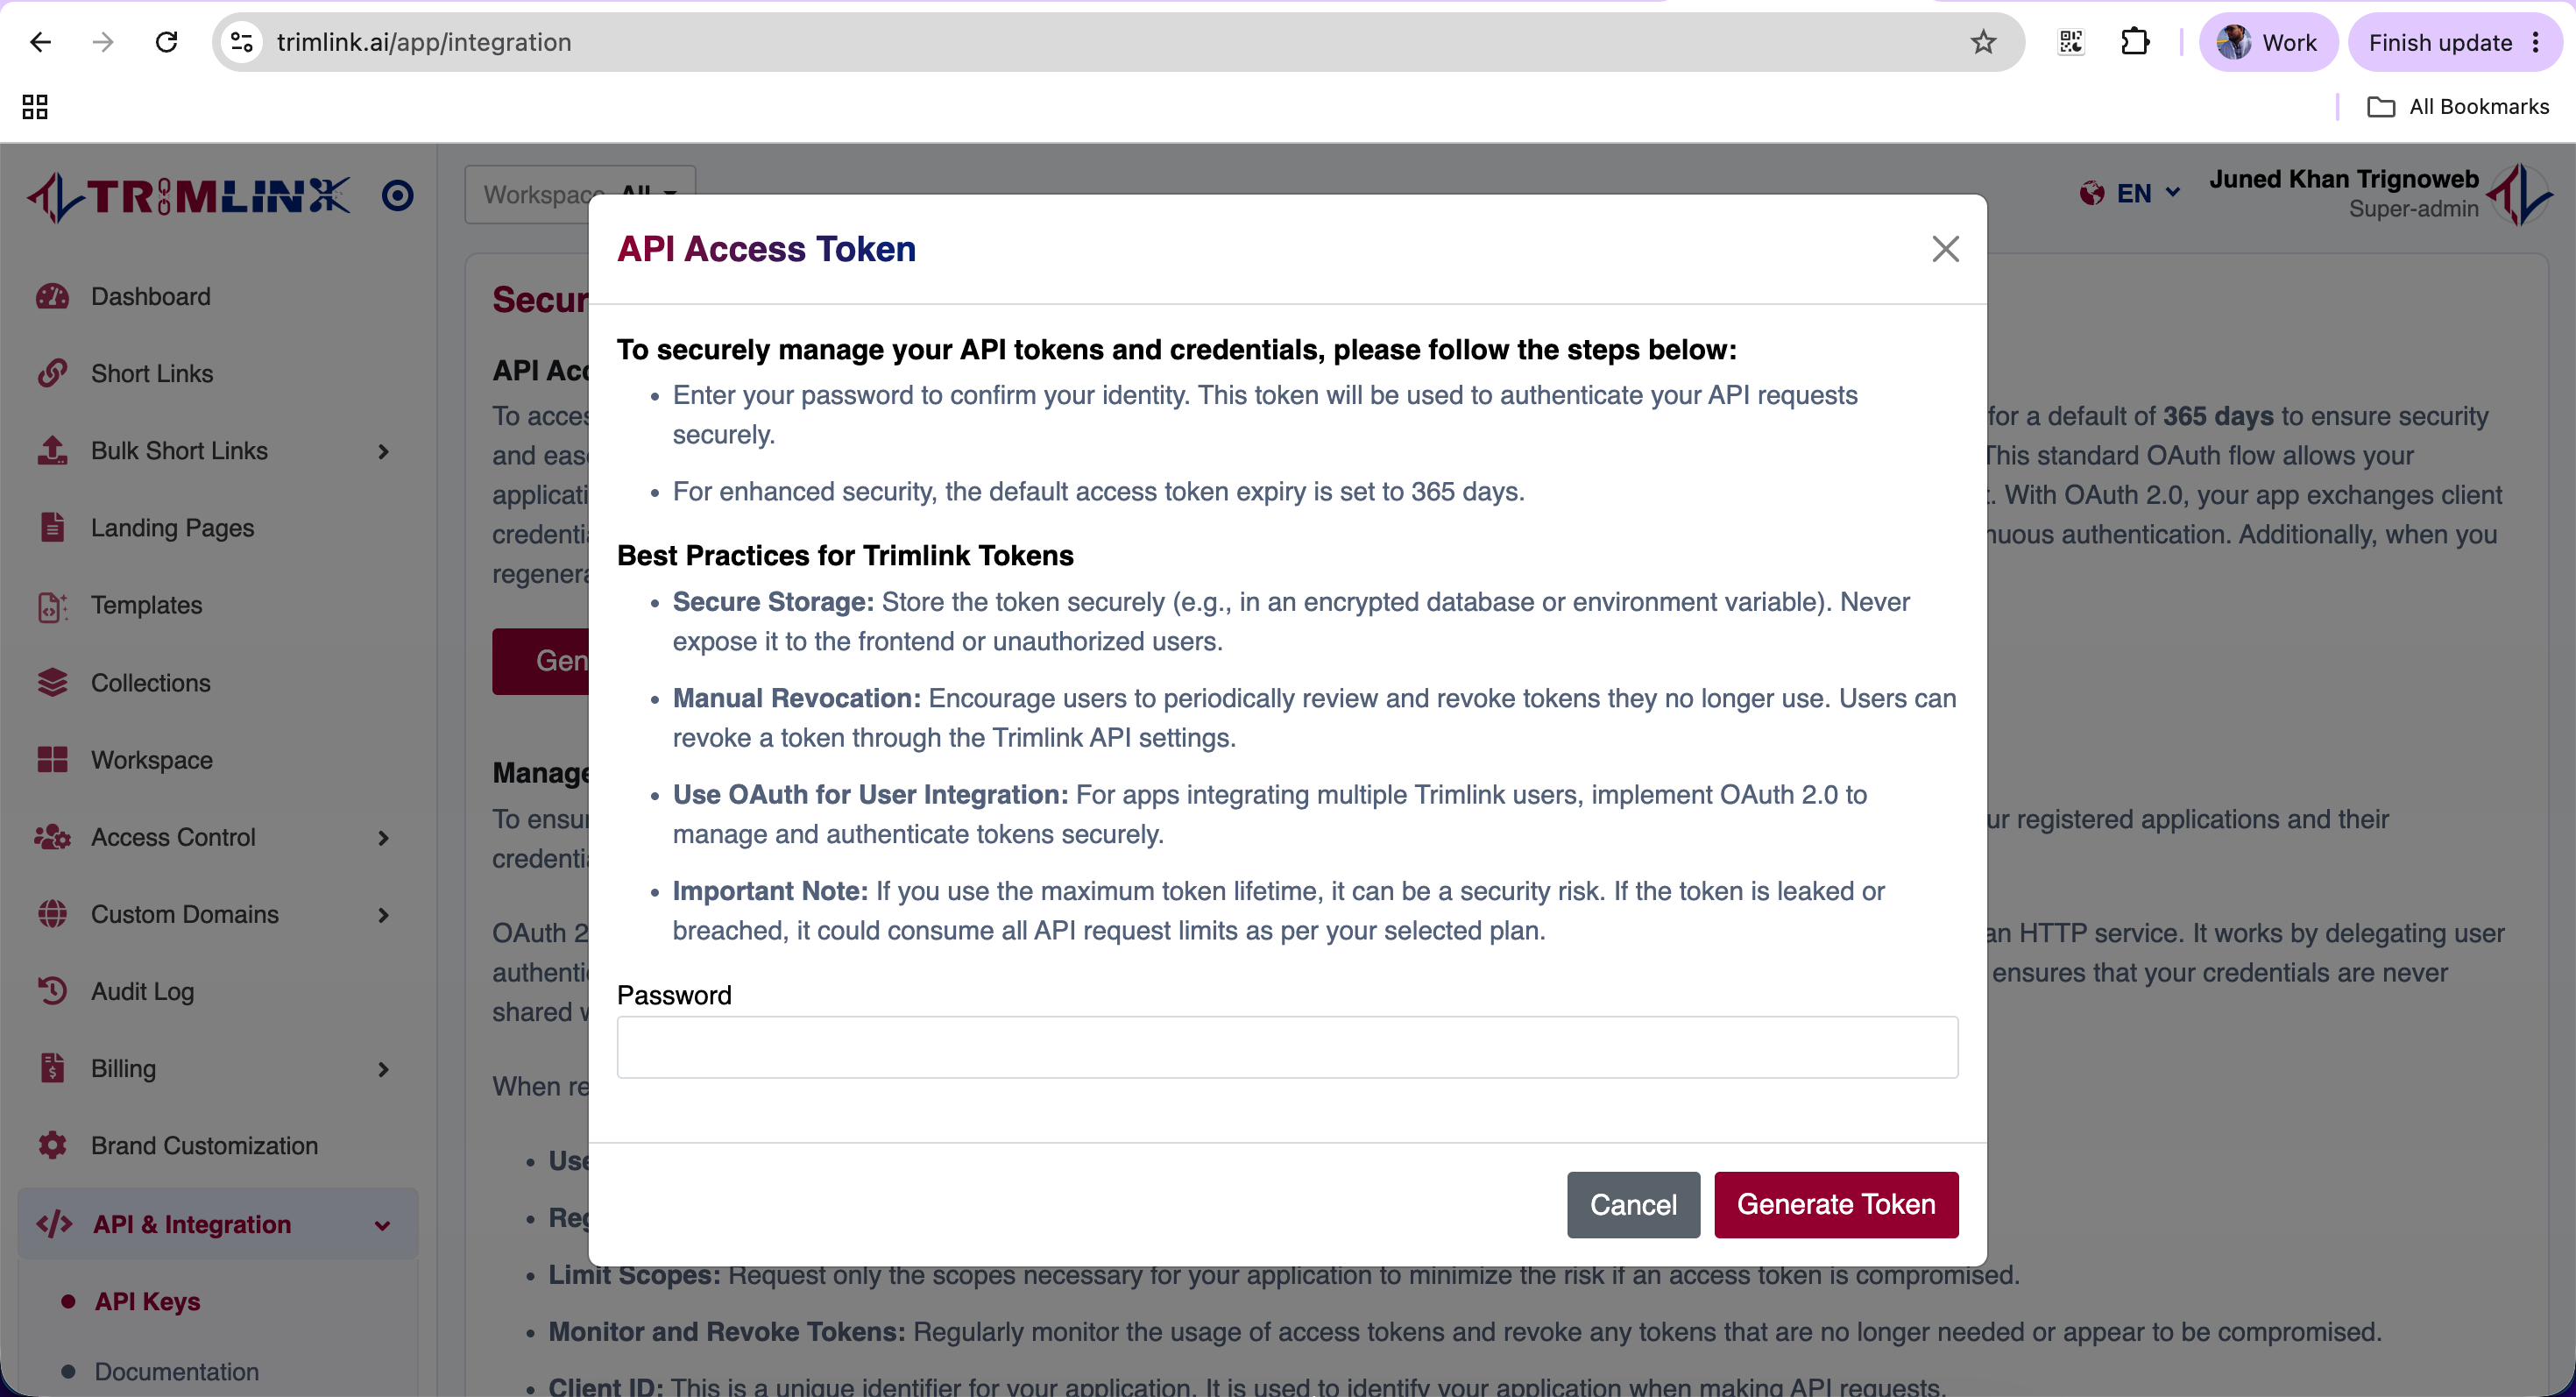
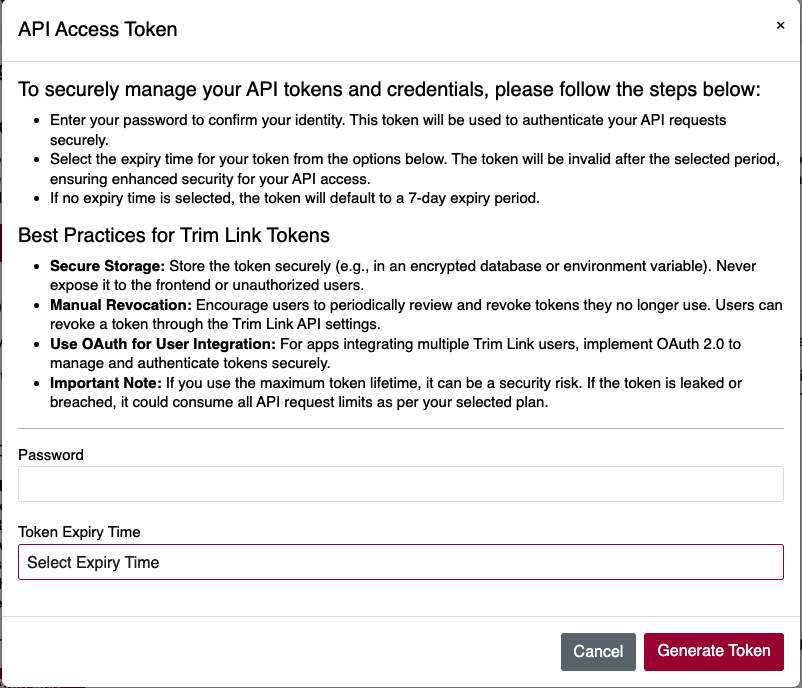
- Click the Generate Token button.
- In the security popup, enter your account password to confirm your identity.
- Select an optional token expiry time.
- Copy the generated token immediately and store it in a secure environment variable.
This token must be included in the header of all your API requests to authenticate your identity and your specific workspace scope.
Now the generated token can be used in your API requests. For example, include it in the Authorization header as follows:
Authorization: Bearer <YOUR_GENERATED_TOKEN>
Phase 2: Register an OAuth Application
If your platform requires external users to log in and securely grant your system access to their data, you must register an OAuth 2.0 application. We utilize the Authorization Code Grant type, which is the industry standard for secure backend integrations.
Understanding OAuth 2.0
OAuth 2.0 is an industry-standard protocol for authorization that allows applications to obtain limited access to user accounts on an HTTP service. It works by delegating user authentication to the service that hosts the user account. This ensures that your users' credentials are never shared directly with the third-party application, which heavily enhances security.
Key Terminology
To properly manage your applications, it is helpful to understand these core components:
- Client ID: A unique identifier for your application. It is used to identify your specific application when making API requests.
- Client Secret: A private key used to authenticate your application. It must be kept completely confidential and never exposed to the frontend or unauthorized users.
- Redirect URI: The secure URL where users will be redirected after they authorize your application.
- PKCE (Proof Key for Code Exchange): An additional security measure for public clients (like mobile apps) that cannot securely store client secrets. It helps prevent authorization code interception attacks.
Security Best Practices
When registering an OAuth application, ensure you follow these practices to maintain continuous security:
- Use Secure Redirect URIs: Always use HTTPS for redirect URIs to prevent the interception of authorization codes.
- Regularly Rotate Secrets: Periodically rotate client secrets and update your backend applications to use the new credentials.
- Limit Scopes: Request only the scopes absolutely necessary for your application. This minimizes risk if an access token is ever compromised.
- Monitor and Revoke Tokens: Regularly monitor the usage of access tokens and revoke any tokens that are no longer needed.
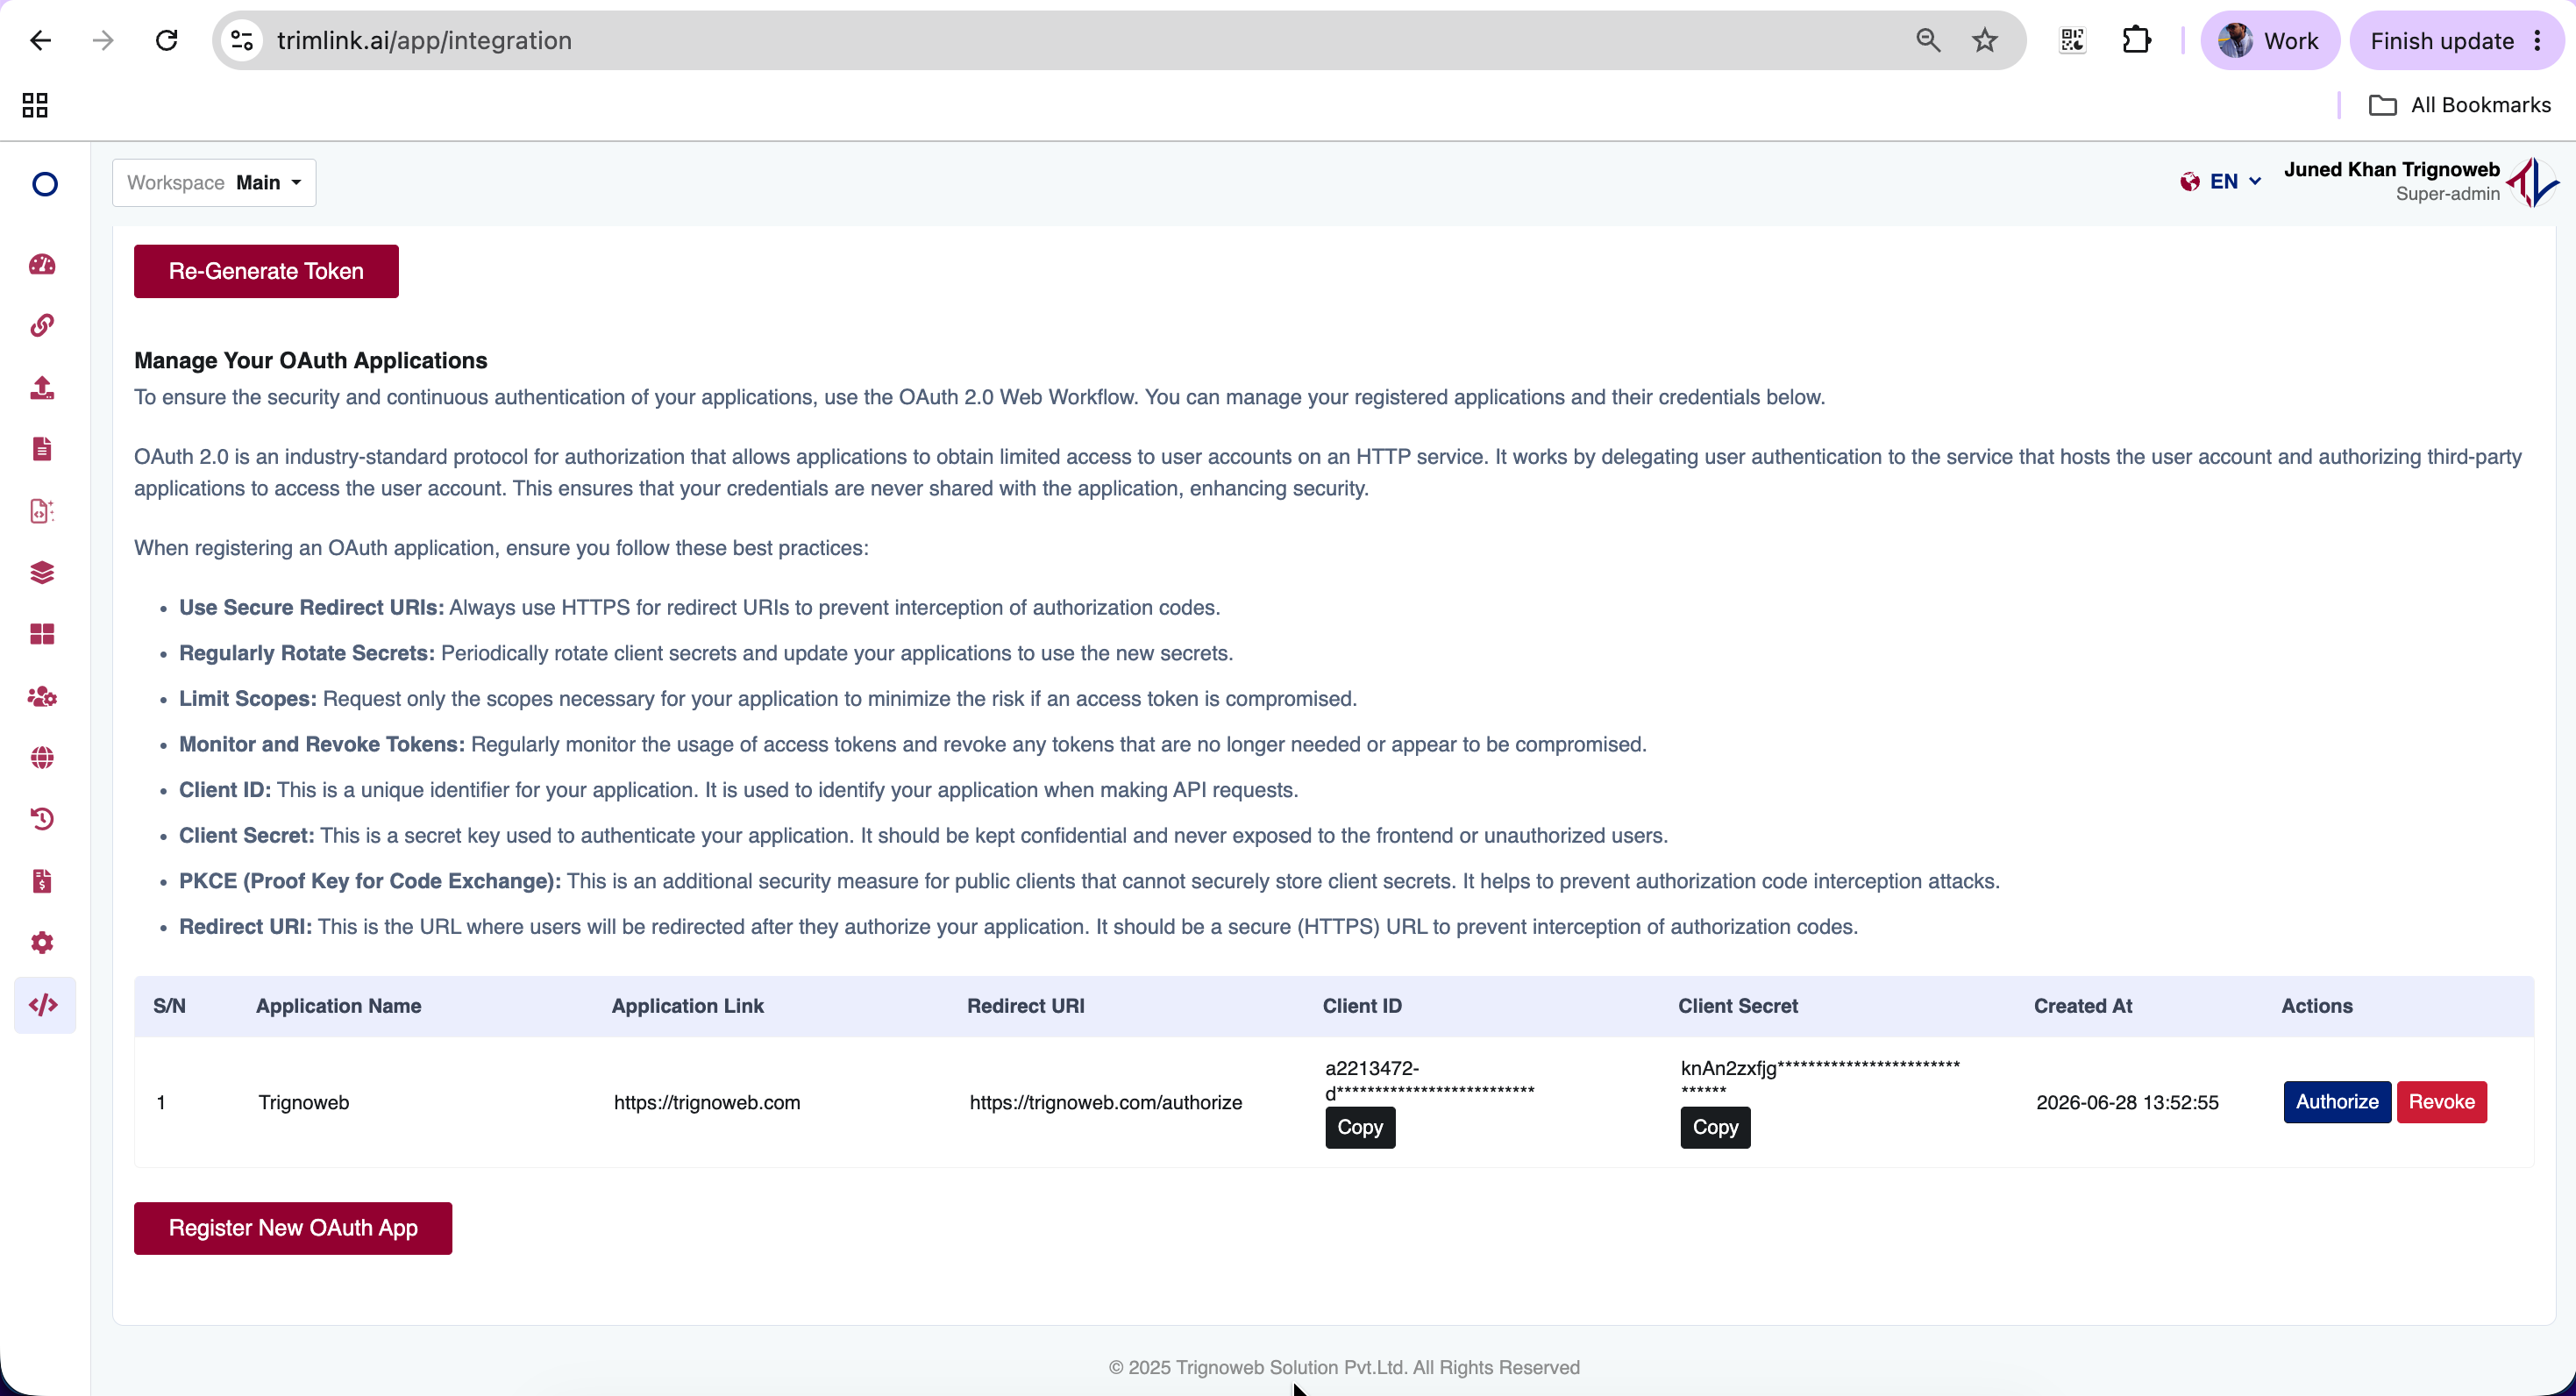
How to Register Your App
- Navigate to API Integration on the left sidebar, then select API Keys.
- Scroll down to the Manage Your OAuth Applications section.
- Click the Register New OAuth App button.
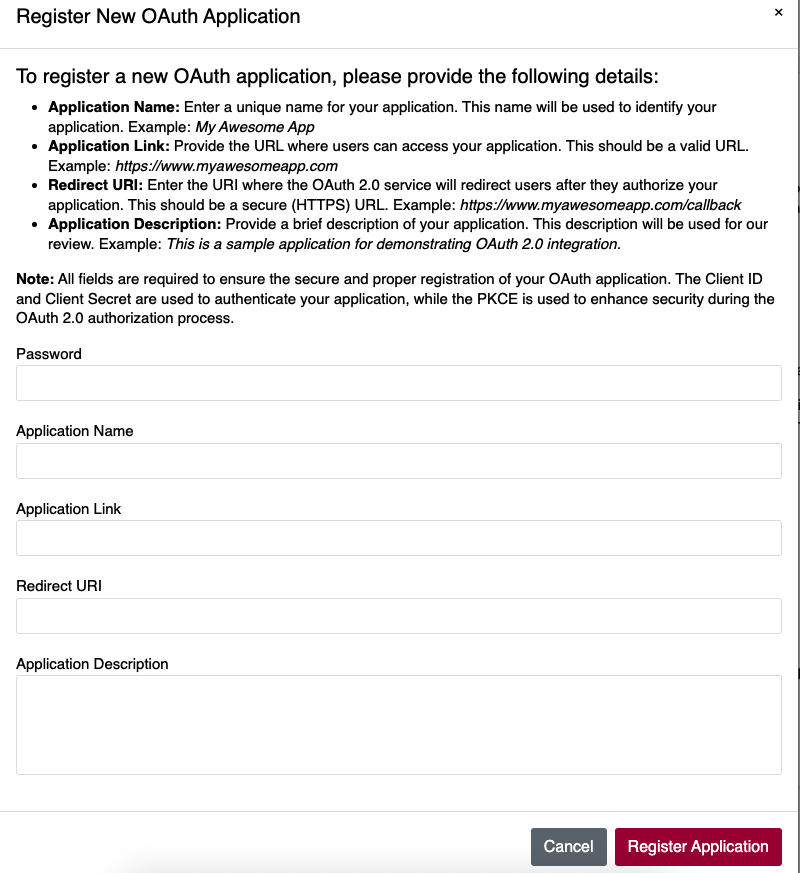
- Provide the following application details:
- Password: Your account password for security verification.
- Application Name: A recognizable name for your app (e.g., Acme Corp Integration).
- Application Link: The primary URL of your application.
- Redirect URI: The secure callback URL where users will be sent after authorizing your app.
- Application Description: A brief explanation of why your app requires access.
- Click Save to generate your unique
client_idandclient_secret.
Important Redirect Requirement: The Redirect URI must be an exact match when making authorization requests, and it must utilize an HTTPS protocol in production environments to prevent interception.
Phase 3: The OAuth Authorization Flow
Once your application is registered, you can begin the authorization process by redirecting users to the secure login portal.
Initiating Authorization
Direct your users to the following URL structure to request access. Be sure to replace the placeholder variables with your specific application details.
[https://trimlink.ai/app/authorize?grant_type=authorization_code&client_id=](https://trimlink.ai/app/authorize?grant_type=authorization_code&client_id=){CLIENT_ID}&redirect_uri={REDIRECT_URI}&response_type=code&scope=*
What the User Sees:
- The user clicks your authorization link.
- They are redirected to the Trimlink server to log in.
- They review the permissions requested by your application.
- Upon approval, they are redirected back to your specified
redirect_uriwith a temporary authorization code.
Phase 4: Handling the Callback
After the user approves access, they will be redirected back to your application. The URL will contain a temporary code parameter.
Example Callback:
[https://www.yourdomain.com/auth/callback?code=def50200...&state=xyz123](https://www.yourdomain.com/auth/callback?code=def50200...&state=xyz123)
Exchanging the Code for a Token
You must immediately exchange this temporary code for a permanent access token by making a backend POST request to the token endpoint.
Endpoint: https://trimlink.ai/api/oauth/token
Request Body (JSON):
{
  "grant_type": "authorization_code",
  "client_id": "YOUR_CLIENT_ID",
  "client_secret": "YOUR_CLIENT_SECRET",
  "redirect_uri": "YOUR_REDIRECT_URI",
  "code": "AUTHORIZATION_CODE_FROM_CALLBACK"
}
Response:
{
  "token_type": "Bearer",
  "expires_in": 31536000,
  "access_token": "eyJ0eXAiOiJKV1QiLCJhbGciOiJSUzI1NiJ9...",
  "refresh_token": "def502001234567890abcdef..."
}
If successful, the server will respond with a Bearer access token. Store this securely in your database against the user's profile.
Phase 5: Making Authenticated API Calls
With an active access token, you can now make authorized requests on behalf of the user. Include the token in the headers of all HTTP requests.
Required Headers:
Authorization: Bearer YOUR_ACCESS_TOKEN
Accept: application/json
Core API Endpoints
| Endpoint | Method | Purpose |
|---|---|---|
/api/1.0/users/list-all-users | GET | Retrieve user account details |
/api/1.0/short-urls/list-all-short-urls | GET | Retrieve all generated short links |
/api/1.0/short-urls/ | POST | Generate a new short link programmatically |
/api/1.0/domains/list-all-domains | GET | Retrieve associated custom domains |
Phase 6: Code Examples by Platform
To accelerate your development, you can utilize the following pre-built client classes to handle the OAuth lifecycle.
PHP (Laravel Compatible)
<?php

class TrimLinkOAuthClient
{
    private $clientId;
    private $clientSecret;
    private $redirectUri;

    public function __construct($clientId, $clientSecret, $redirectUri)
    {
        $this->clientId = $clientId;
        $this->clientSecret = $clientSecret;
        $this->redirectUri = $redirectUri;
    }

    /**
     * Generate authorization URL
     */
    public function getAuthorizationUrl($state = null)
    {
        $params = [
            'grant_type' => 'authorization_code',
            'client_id' => $this->clientId,
            'redirect_uri' => $this->redirectUri,
            'response_type' => 'code',
            'scope' => '*'
        ];

        if ($state) {
            $params['state'] = $state;
        }

        return '[https://trimlink.ai/app/authorize](https://trimlink.ai/app/authorize)?' . http_build_query($params);
    }

    /**
     * Exchange authorization code for access token
     */
    public function getAccessToken($authorizationCode)
    {
        $data = http_build_query([
            'grant_type' => 'authorization_code',
            'client_id' => $this->clientId,
            'client_secret' => $this->clientSecret,
            'redirect_uri' => $this->redirectUri,
            'code' => $authorizationCode
        ]);

        $ch = curl_init('[https://trimlink.ai/api/oauth/token](https://trimlink.ai/api/oauth/token)');
        curl_setopt_array($ch, [
            CURLOPT_RETURNTRANSFER => true,
            CURLOPT_POST => true,
            CURLOPT_POSTFIELDS => $data,
            CURLOPT_HTTPHEADER => [
                'Content-Type: application/x-www-form-urlencoded',
            ],
        ]);

        $response = curl_exec($ch);
        $httpCode = curl_getinfo($ch, CURLINFO_HTTP_CODE);
        curl_close($ch);

        if ($httpCode !== 200) {
            dd('Token exchange failed:', $response);
        }
        return json_decode($response, true);
    }

    /**
     * Make authenticated API request
     */
    public function makeApiRequest($endpoint, $method = 'GET', $data = null, $accessToken)
    {
        $ch = curl_init();
        curl_setopt($ch, CURLOPT_URL, '[https://trimlink.ai](https://trimlink.ai)' . $endpoint);
        curl_setopt($ch, CURLOPT_CUSTOMREQUEST, $method);
        curl_setopt($ch, CURLOPT_HTTPHEADER, [
            'Authorization: Bearer ' . $accessToken,
            'Accept: application/json',
            'Content-Type: application/json'
        ]);
        curl_setopt($ch, CURLOPT_RETURNTRANSFER, true);

        if ($data && in_array($method, ['POST', 'PUT', 'PATCH'])) {
            curl_setopt($ch, CURLOPT_POSTFIELDS, json_encode($data));
        }

        $response = curl_exec($ch);
        $httpCode = curl_getinfo($ch, CURLINFO_HTTP_CODE);
        curl_close($ch);

        return [
            'status_code' => $httpCode,
            'body' => json_decode($response, true)
        ];
    }
}

// Usage Example
$oauth = new TrimLinkOAuthClient(
    'YOUR_CLIENT_ID',
    'YOUR_CLIENT_SECRET',
    '[https://yourapp.com/auth/callback](https://yourapp.com/auth/callback)'
);

// Step 1: Redirect user to authorization URL
if (!isset($_GET['code'])) {
    $authUrl = $oauth->getAuthorizationUrl($_SESSION['oauth_state']);
    header('Location: ' . $authUrl);
    exit;
}

// Step 2: Handle callback and exchange code for token
try {
    $tokenData = $oauth->getAccessToken($_GET['code']);
    $accessToken = $tokenData['access_token'];

    // Store access token securely (database, session, etc.)
    $_SESSION['access_token'] = $accessToken;

    // Step 3: Make API requests
    $response = $oauth->makeApiRequest('/api/1.0/short-urls/list-all-short-urls', 'GET', null, $accessToken);

    if ($response['status_code'] === 200) {
        $shortUrls = $response['body'];
        // Process the data
    }

} catch (Exception $e) {
    echo 'OAuth Error: ' . $e->getMessage();
}
?>
Node.js Implementation
const axios = require("axios");
const express = require("express");
const session = require("express-session");

class TrimLinkOAuthClient {
  constructor(clientId, clientSecret, redirectUri) {
    this.clientId = clientId;
    this.clientSecret = clientSecret;
    this.redirectUri = redirectUri;
    this.baseUrl = "[https://trimlink.ai](https://trimlink.ai)";
  }

  /**
   * Generate authorization URL
   */
  getAuthorizationUrl(state = null) {
    const params = new URLSearchParams({
      grant_type: "authorization_code",
      client_id: this.clientId,
      redirect_uri: this.redirectUri,
      response_type: "code",
      scope: "*",
    });

    if (state) {
      params.append("state", state);
    }

    return `${this.baseUrl}/app/authorize?${params.toString()}`;
  }

  /**
   * Exchange authorization code for access token
   */
  async getAccessToken(authorizationCode) {
    const data = {
      grant_type: "authorization_code",
      client_id: this.clientId,
      client_secret: this.clientSecret,
      redirect_uri: this.redirectUri,
      code: authorizationCode,
    };

    try {
      const response = await axios.post(
        `${this.baseUrl}/api/oauth/token`,
        data,
        {
          headers: {
            Accept: "application/json",
            "Content-Type": "application/json",
          },
        },
      );

      return response.data;
    } catch (error) {
      throw new Error(
        `Token exchange failed: ${error.response?.data || error.message}`
      );
    }
  }

  /**
   * Make authenticated API request
   */
  async makeApiRequest(endpoint, method = "GET", data = null, accessToken) {
    const config = {
      method: method.toLowerCase(),
      url: `${this.baseUrl}${endpoint}`,
      headers: {
        Authorization: `Bearer ${accessToken}`,
        Accept: "application/json",
        "Content-Type": "application/json",
      },
    };

    if (data && ["post", "put", "patch"].includes(method.toLowerCase())) {
      config.data = data;
    }

    try {
      const response = await axios(config);
      return {
        statusCode: response.status,
        body: response.data,
      };
    } catch (error) {
      return {
        statusCode: error.response?.status || 500,
        body: error.response?.data || { message: error.message },
      };
    }
  }
}

// Usage Example (Express.js)
const app = express();

app.use(
  session({
    secret: "your-secret-key",
    resave: false,
    saveUninitialized: true,
  })
);

const oauth = new TrimLinkOAuthClient(
  "YOUR_CLIENT_ID",
  "YOUR_CLIENT_SECRET",
  "[https://yourapp.com/auth/callback](https://yourapp.com/auth/callback)"
);

// Route to initiate OAuth
app.get("/auth/login", (req, res) => {
  const authUrl = oauth.getAuthorizationUrl();
  res.redirect(authUrl);
});

// OAuth callback route
app.get("/auth/callback", async (req, res) => {
  const { code, error } = req.query;

  if (error) {
    return res.status(400).send(`Authorization failed: ${error}`);
  }

  try {
    // Exchange code for token
    const tokenData = await oauth.getAccessToken(code);
    req.session.accessToken = tokenData.access_token;

    // Make API request
    const response = await oauth.makeApiRequest(
      "/api/1.0/short-urls/list-all-short-urls",
      "GET",
      null,
      req.session.accessToken
    );

    if (response.statusCode === 200) {
      res.json({
        message: "Success!",
        data: response.body,
      });
    } else {
      res.status(response.statusCode).json(response.body);
    }
  } catch (error) {
    res.status(500).send(`OAuth error: ${error.message}`);
  }
});

// Protected API route example
app.get("/api/urls", async (req, res) => {
  if (!req.session.accessToken) {
    return res.status(401).json({ error: "Not authenticated" });
  }

  try {
    const response = await oauth.makeApiRequest(
      "/api/1.0/short-urls/list-all-short-urls",
      "GET",
      null,
      req.session.accessToken
    );

    res.status(response.statusCode).json(response.body);
  } catch (error) {
    res.status(500).json({ error: error.message });
  }
});

app.listen(3000, () => {
  console.log("Server running on http://localhost:3000");
});
Python Implementation
import requests
import urllib.parse
from typing import Dict, Optional

class TrimLinkOAuthClient:
    def __init__(self, client_id: str, client_secret: str, redirect_uri: str):
        self.client_id = client_id
        self.client_secret = client_secret
        self.redirect_uri = redirect_uri
        self.base_url = "[https://trimlink.ai](https://trimlink.ai)"

    def get_authorization_url(self, state: Optional[str] = None) -> str:
        """Generate authorization URL"""
        params = {
            'grant_type': 'authorization_code',
            'client_id': self.client_id,
            'redirect_uri': self.redirect_uri,
            'response_type': 'code',
            'scope': '*'
        }

        if state:
            params['state'] = state

        return f"{self.base_url}/app/authorize?{urllib.parse.urlencode(params)}"

    def get_access_token(self, authorization_code: str) -> Dict:
        """Exchange authorization code for access token"""
        data = {
            'grant_type': 'authorization_code',
            'client_id': self.client_id,
            'client_secret': self.client_secret,
            'redirect_uri': self.redirect_uri,
            'code': authorization_code
        }

        response = requests.post(
            f"{self.base_url}/api/oauth/token",
            json=data,
            headers={'Accept': 'application/json'}
        )

        if response.status_code != 200:
            raise Exception(f"Token exchange failed: {response.text}")

        return response.json()

    def make_api_request(self, endpoint: str, method: str = 'GET',
                        data: Optional[Dict] = None, access_token: str = None) -> Dict:
        """Make authenticated API request"""
        headers = {
            'Authorization': f'Bearer {access_token}',
            'Accept': 'application/json',
            'Content-Type': 'application/json'
        }

        url = f"{self.base_url}{endpoint}"

        if method.upper() == 'GET':
            response = requests.get(url, headers=headers)
        elif method.upper() == 'POST':
            response = requests.post(url, json=data, headers=headers)
        elif method.upper() == 'PUT':
            response = requests.put(url, json=data, headers=headers)
        elif method.upper() == 'DELETE':
            response = requests.delete(url, headers=headers)
        else:
            raise ValueError(f"Unsupported HTTP method: {method}")

        return {
            'status_code': response.status_code,
            'body': response.json() if response.content else None
        }

# Usage Example (Flask)
from flask import Flask, request, redirect, session

app = Flask(__name__)
app.secret_key = 'your-secret-key'

oauth = TrimLinkOAuthClient(
    client_id='YOUR_CLIENT_ID',
    client_secret='YOUR_CLIENT_SECRET',
    redirect_uri='[https://yourapp.com/auth/callback](https://yourapp.com/auth/callback)'
)

@app.route('/auth/login')
def login():
    """Redirect to OAuth authorization"""
    auth_url = oauth.get_authorization_url()
    return redirect(auth_url)

@app.route('/auth/callback')
def callback():
    """Handle OAuth callback"""
    code = request.args.get('code')
    error = request.args.get('error')

    if error:
        return f"Authorization failed: {error}"

    try:
        # Exchange code for token
        token_data = oauth.get_access_token(code)
        session['access_token'] = token_data['access_token']

        # Make API request
        response = oauth.make_api_request(
            '/api/1.0/short-urls/list-all-short-urls',
            'GET',
            access_token=session['access_token']
        )

        if response['status_code'] == 200:
            return f"Success! Retrieved {len(response['body']['data'])} URLs"
        else:
            return f"API request failed: {response['body']}"

    except Exception as e:
        return f"OAuth error: {str(e)}"

if __name__ == '__main__':
    app.run(debug=True)
Phase 7: Error Handling & Troubleshooting
If you encounter issues during your integration, review the standard error responses below.
Common API Errors
| Error Code | Description | Solution |
|---|---|---|
400 | Bad Request | Check your request parameters for typos. |
401 | Unauthorized | Verify your access token is valid and not expired. |
403 | Forbidden | Check the user's workspace permissions. |
404 | Not Found | Verify the endpoint URL is correct. |
422 | Validation Error | Ensure all required fields are included. |
429 | Rate Limited | You have exceeded the request limit. Wait before trying again. |
500 | Server Error | Contact support if this persists. |
Common OAuth Issues & Solutions
-
"Invalid Redirect URI"
-
Cause: The redirect URI in your request doesn't match the registered URI exactly.
-
Solution: Ensure an exact match, including the protocol (HTTPS), domain, path, and trailing slashes.
-
"Invalid Client"
-
Cause: Client ID or Client Secret is incorrect.
-
Solution: Verify credentials from your dashboard to ensure there are no extra spaces.
-
"Authorization Code Expired"
-
Cause: Authorization codes have a short lifespan (usually 10 minutes).
-
Solution: Exchange the code for a token immediately upon receiving it.
Phase 8: Testing Your Integration
Before deploying your integration to production, we recommend testing all possible scenarios.
Test Checklist:
- Successful authorization flow.
- Handling when a user denies authorization.
- Handling invalid client credentials.
- Handling an expired authorization code.
- API requests with valid tokens.
- API requests with expired tokens.
Pro Tip: Use a local HTTPS server (via tools like ngrok) to test your secure Redirect URIs during local development.
Phase 9: Additional Resources & Availability
API and OAuth integrations are premium features designed for advanced automation and high-volume routing. Access and rate limits depend on your current subscription plan:
| Plan | API Access | Rate Limits |
|---|---|---|
| Free | Normal Access | 10 requests / minute |
| Pro | Standard Access | 30 requests / minute |
| Bulk | Advanced Access | 100 requests / minute |
| Enterprise | Unrestricted | Custom provisioning |
Helpful Links:
- Base API URL:
https://trimlink.ai/api/1.0/ - Response Format: JSON
- System Status:
https://status.trimlink.ai
Need Help? If you encounter 401 Unauthorized errors or have questions about your specific integration limits, please reach out to our technical team via our support page or email us at [email protected].
Frequently Asked Questions
- Your API access is scoped to your active Workspace at the time you generate the token. To access data across every workspace, switch your dashboard view to 'All Workspaces' before generating your credentials.
- An API Access Token is for your own internal scripts. An OAuth Application is for building apps where external users securely grant your app access to their data.
- Tokens expire in 365 days by default, but we strongly recommend setting a shorter, custom expiration period for better security.
- HTTPS encrypts the data sent between servers. This prevents attackers from intercepting authorization codes during the OAuth flow.
- Immediately delete the compromised OAuth application from your dashboard and register a new one to generate a fresh Client ID and Client Secret.
- Yes. Standard API requests are limited based on your subscription plan. Exceeding these limits will return a '429 Too Many Requests' error.
- Yes. You can delete or revoke any API token or OAuth application at any time from your dashboard to instantly terminate access.
- PKCE is highly recommended for public clients (like mobile apps) that cannot securely store a Client Secret on the device.
- You should use the refresh token provided during the initial authentication flow to obtain a new, valid access token without prompting the user to log in again.
- Only Organization Owners or users with specific administrative permissions can generate API tokens or register OAuth applications.