Customize Visitor Branding for Short Links
Brand Customization allows you to create a fully white-labeled experience for your audience. Instead of seeing Trimlink's logo when they hit a password-protected link or an error page, your visitors will see your own brand's logo and custom messaging.
When you create a new Workspace, it automatically inherits your main Organization's branding. However, you can easily override these settings so each Workspace has its own unique logo and footer. This is highly useful for digital marketing agencies, resellers, and businesses managing multiple client brands from a single Trimlink account.
Critical Branding Note: This feature only customizes the visitor experience. It does not change the colors or logos inside your internal Trimlink admin dashboard, sidebar, or workspace navigation menu.
Phase 1: Access Brand Customization
You can set up unique branding on a workspace-by-workspace basis.
How to Open the Settings
- Sign in to your Trimlink Dashboard.
- From the top menu, switch to the specific Workspace you want to customize.
- Navigate to the left sidebar and click Brand Customization.
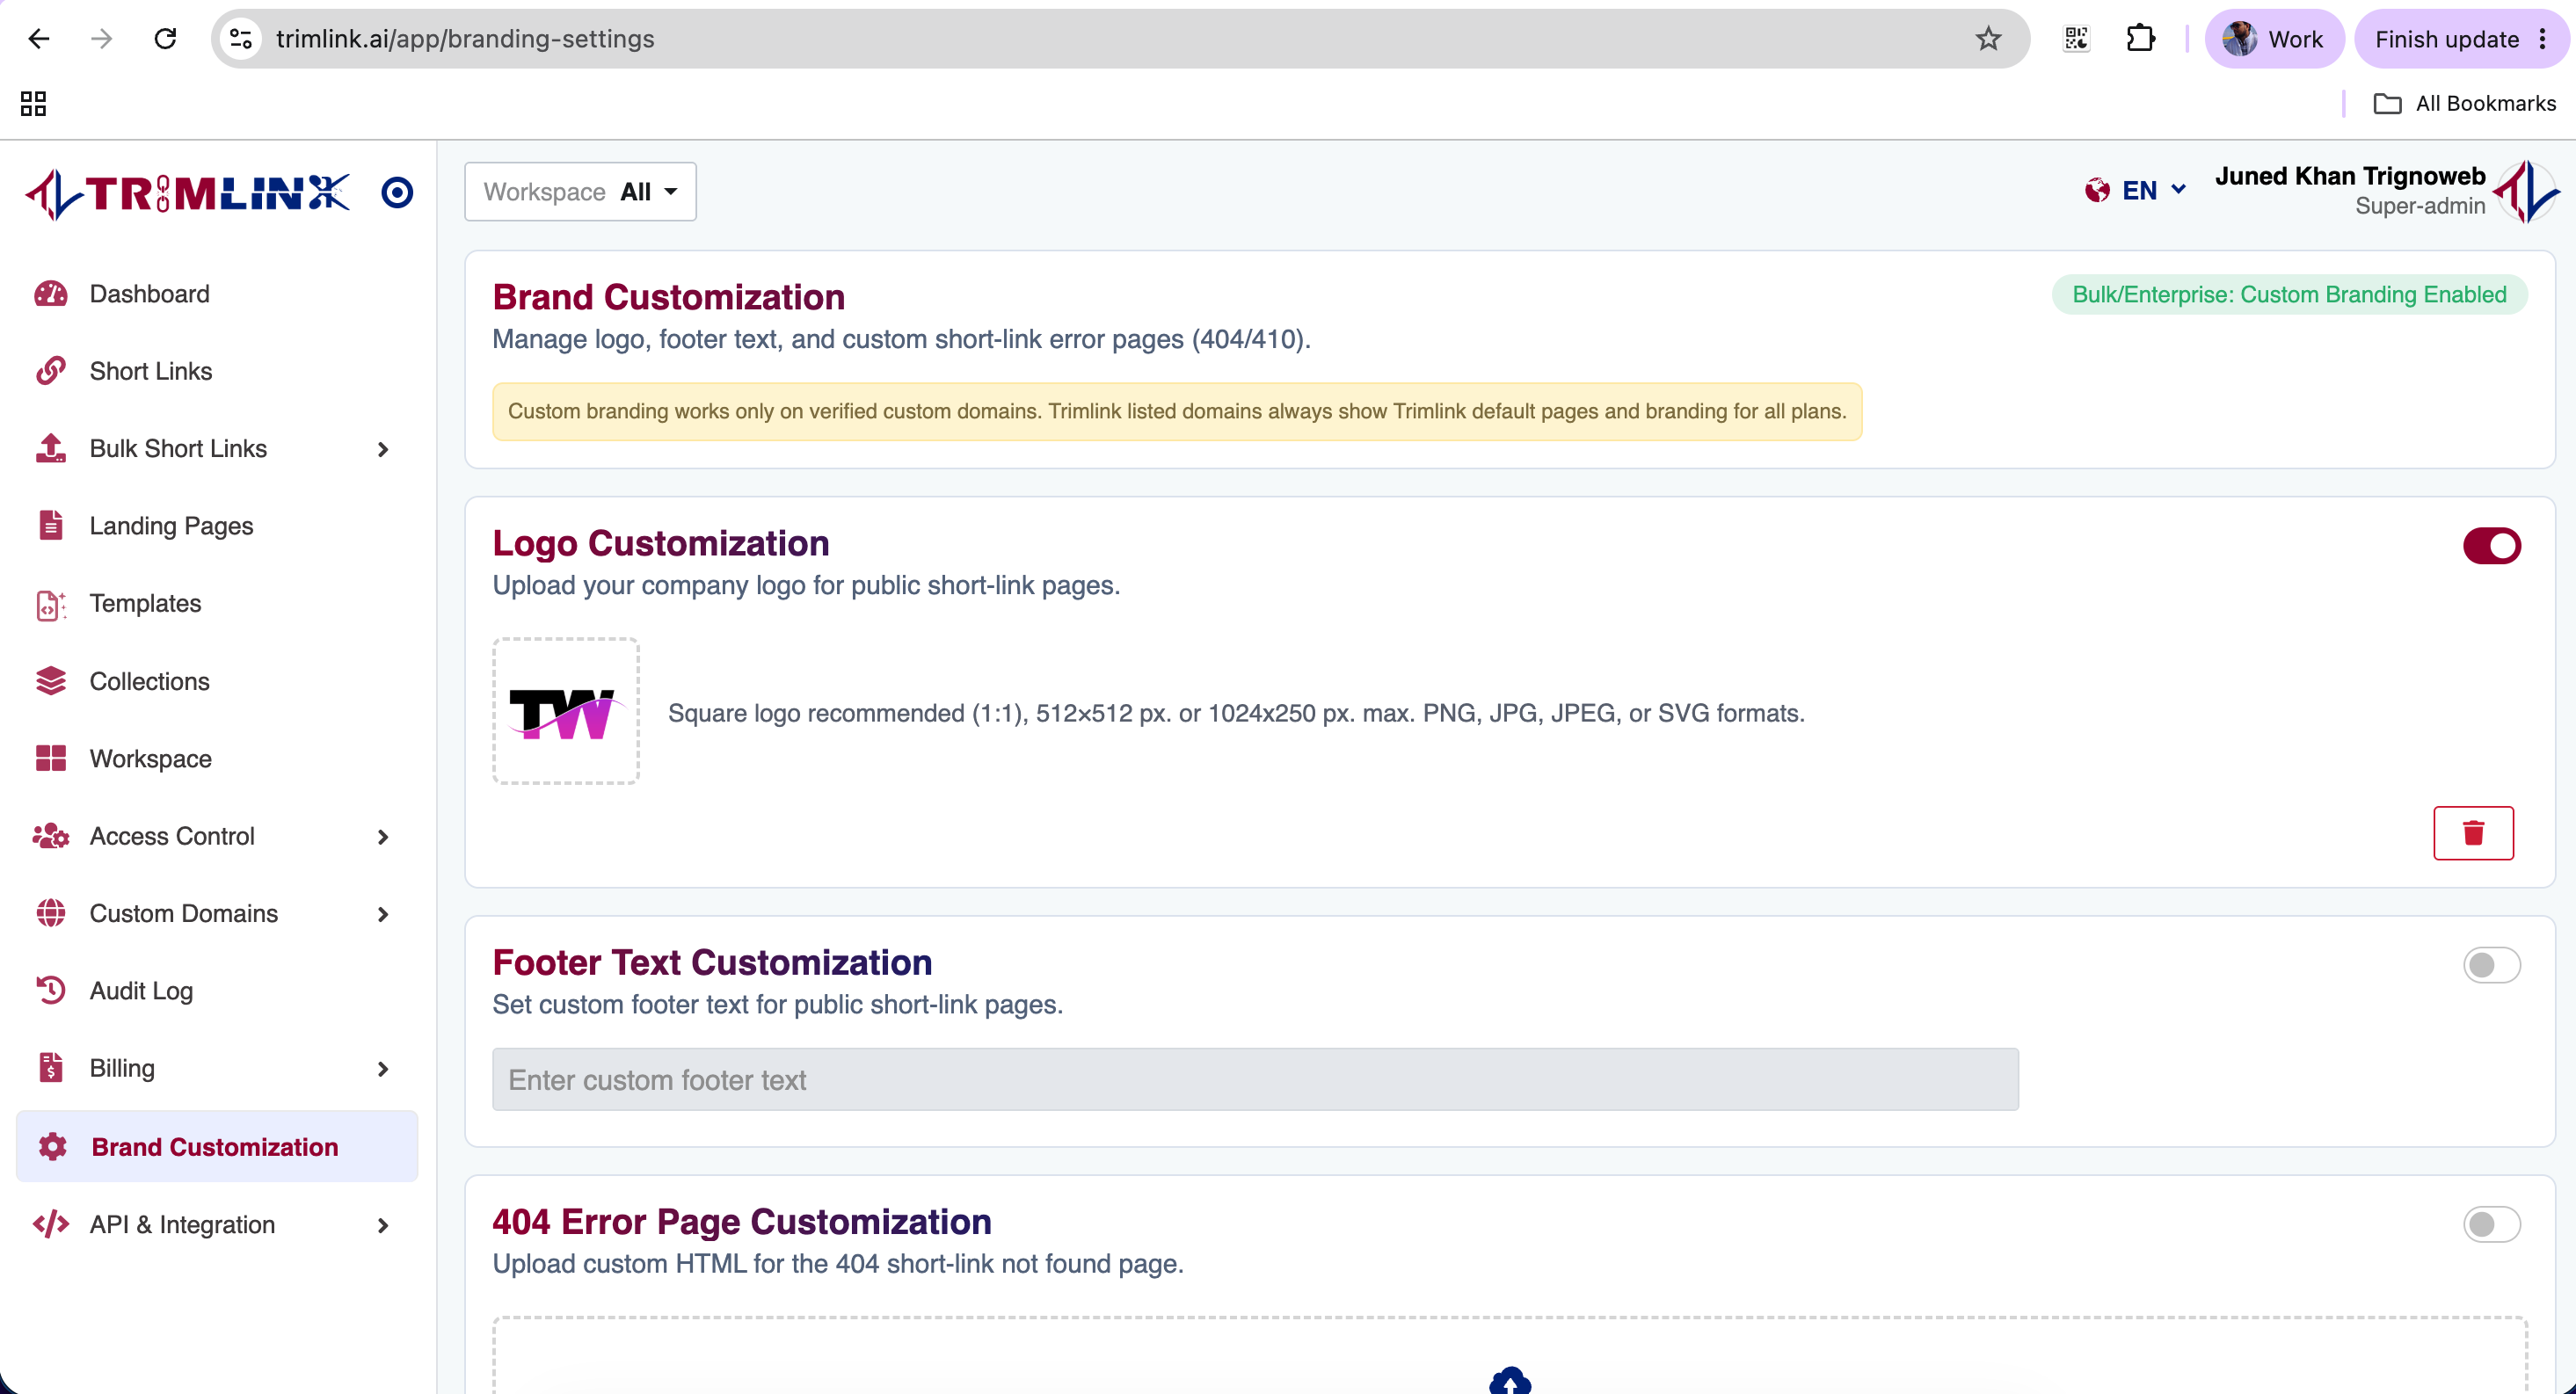
Phase 2: Upload Your Brand Logo
Your logo is the first thing visitors will see if they hit a security checkpoint before reaching their final destination. Your uploaded logo will appear on Password Protected screens, GPS Verification pages, and Interstitial warning pages.
How to Upload
- Locate the Logo Customization section on the page.
- Enable the Custom Logo toggle to activate the upload option.
- Click the Upload icon.
- Select your company (or client's) logo from your computer. We highly recommend using a transparent PNG file for the most professional look.
- Wait for the upload bar to complete.
Important Logo Note: Square logo recommended (1:1), 512×512 px. or 1024x250 px. max. PNG, JPG, JPEG, or SVG formats.
![]()
Phase 3: Add Custom Footer Text
You can add professional copyright text, legal disclaimers, or brand messaging to the bottom of all visitor-facing pages.
How to Configure
- Scroll down to the Footer Text Customization section.
- Enable the Custom Footer toggle to activate the text box.
- Enter your desired footer text into the box.
- Review the text for spelling and accuracy.
Common Footer Examples:
- © 2026 Your Agency Name. All Rights Reserved.
- Powered by Client Brand
- Security Checkpoint - Acme Corp

Phase 4: Upload Custom Error Pages
If a visitor clicks a link that is broken or has been deleted, you can replace the default Trimlink error screen with your own branded HTML files.
- 404 Not Found: Shown when a short link does not exist (e.g., the visitor made a typo).
- 410 Gone: Shown when a short link has been permanently deleted or expired.
How to Upload
- Scroll to the 404 Error Page Customization section.
- Enable the Custom 404 Page toggle to activate the upload option.
- Upload your custom HTML file. (If you do not know how to code an HTML file, your web developer can provide a simple one for you).
- Repeat this process for the 410 Error Page Customization.
- Wait for both uploads to finish.
Important Custom Domain Requirement: Custom 404 and 410 HTML pages will only be shown to visitors if they access the link through your connected Custom Domain (e.g.,
links.yourbrand.com). If they use a default Trimlink domain, they will see the standard Trimlink error page.

Phase 5: Manage Existing Branding Assets
After uploading a custom logo, footer text, or custom error page, you can easily remove it or restore your original Organization's branding at any time.
1. Delete an Uploaded Asset
If you no longer want to use a custom logo or error page for this specific Workspace, you can permanently delete the uploaded file.
- Locate the uploaded asset you wish to remove (Logo, 404 Page, or 410 Page).
- Click the Delete button next to the file.
- Confirm the deletion if prompted by the system.
Note on Deletions: Deleting an uploaded file does not automatically restore your main Organization's branding. It simply leaves the Workspace without a custom asset until you upload a new one or choose to reset it to default.
2. Reset to Default Branding
If you have customized a Workspace but decide you want to use your main Organization's original branding again, you can easily restore the default settings.
- Click the Reset to Default button.
- Confirm the action when prompted.
This will immediately restore your Organization's original Brand Logo, Footer Text, and Error Pages for this specific Workspace.
Important Reset Note: Resetting to default only affects the Workspace you are currently editing. Your other Workspaces and your main Organization branding will remain completely untouched.
Phase 6: Save & Test
- Review your uploaded logo, footer text, custom error pages, or deleted assets to ensure everything is correct.
- Click the Save Changes button at the bottom of the screen.
- Wait for the green success confirmation.
All branding updates become active immediately for the selected Workspace. We highly recommend generating a quick password-protected link and opening it in an Incognito/Private browser window to test your new visitor experience!
Plan Availability
Brand Customization is a premium feature. Access depends on your current subscription plan:
| Plan | Brand Customization Availability |
|---|---|
| Free | Trimlink branding shown |
| Pro | Trimlink branding removed (No custom uploads) |
| Bulk | Full branding customization |
| Enterprise | Full branding customization |
Need Help? If your custom HTML error pages are not rendering correctly, or if you need assistance configuring your Custom Domain to support them, please contact our technical support team at [email protected].
Frequently Asked Questions
- Brand Customization lets each Workspace display its own unique logo, footer text, and branded error pages to visitors who click on short links generated from that Workspace.
- No. Brand Customization only affects the pages your external visitors see (like password screens or 404 pages). It does not change your internal admin dashboard or account UI.
- Your branding appears on all visitor-facing security and routing pages, such as password protection screens, GPS verification pages, and interstitial warning pages.
- Yes. Each Workspace operates independently. This allows agencies to set up a unique logo and footer for every single client they manage.
- A 404 error means the link was not found or a typo was made. A 410 error explicitly tells search engines and visitors that the link has been permanently deleted or expired.
- No. Custom 404 and 410 HTML pages will only be displayed when a visitor accesses a link through your connected Custom Domain.
- Upgrading to a Pro plan automatically removes the Trimlink branding. Upgrading to Bulk or Enterprise allows you to replace it with your own custom logo.
- You can click the 'Reset to Default' button. This completely removes the workspace-specific branding and restores your main Organization's original logo and footer.
- Yes. Branding is applied at the Workspace level. Updating your logo will instantly update the visitor experience for all past and future links in that Workspace.
- Changes take effect immediately across all live links the moment you click Save Changes.